↧
Jolly ID Flow Tutorial: Working With Records
↧
Cleaning the Magicard Pronto
↧
↧
Cleaning the IDP Smart-50 Printer
↧
CardPresso – Print Mifare UID on DB Field
↧
Installing the DTC1000 on Mac OC 10.8
Click here for instructions to install the DTC1000 driver on Mac OS 10.8.
↧
↧
How can I upgrade to an higher edition? cardPresso
Here are the instructions on how to upgrade to a higher edition:
↧
Update Firmware – Evolis Elypso
Take the following steps to update your Elypso firmware:
Download the latest firmware from Evolis’ website
Make sure that there are no print jobs in the print que
Open the Evolis Print Center
Double Click on the Elypso Printer
Click on Maintenance. Click on Firmware Update
 Browse for the new firmware file
 Click on the Update tab

It may take several minutes for the process to complete
↧
How to check your Epi Suite Dongle Version
To check your EpiSuite dongle version double click on your C drive, open program file folder, open ImageWare Systems folder, open the EPISUITE folder, open the 6 folder, and then run the CBRead.exe file. Click the Read Key button.

↧
How to enter Temporary Bypass Code – Epi Suite
To install the Temporary Bypass Code, locate and run the TAENABLER.EXE program located in your EPI Suite program folder.
For example, on Windows XP, the default location is located in:
C:\Program Files\ImageWare Systems\EPISUITE\5x (or newer)
Enter your Temporary Bypass Code and click on the Create Temporary Authorization button.
- If the authorization fails, please verify that the Temporary Bypass Code has been properly entered and verify that your system date is set to the current date.
Please ensure that you are logged onto your workstation as the Administrator.
↧
↧
How to Change the Print Head -Evolis Primacy
↧
ID Flow – Transfer your software license to a different PC
Your Jolly Software license entitles you to use the software on a single computer. To use the software on additional computers it is necessary to purchase a separate license for each computer. If you will no longer be using the software on a computer, you can deactivate the software on the old computer and then activate it on the new computer. For instructions on deactivating your software, please see Deactivating your software license.
Once you have completed the deactivation process, follow the instructions to Activate your software license on the new computer.
↧
Test Print – Toppan CP500
Go to your printers and faxes folder. Right click on the Toppan CP 500 and choose printing preferences.
Click on the maintenance tab. Click on Test Data Printing

↧
Proximity Card Bit Format and Facility Code Guide
Proximity cards are an amazing piece of technology that provide constantly expanding opportunities and applications in our industry. But what if you want a 26-bit Wiegand card, with facility code 300? And what is the HID compatible Format Code for that?
Ordering prox cards can seem more like an art than an order. Therefore, the table below has been configured to help you with all your proximity card details, and ultimately your orders! We hope to have made life a little easier regarding your access control needs, and are happy to answer any remaining questions you may have.
Format and Facility Code Guide. | |||
|---|---|---|---|
| Format: Bits | Possible Facility Codes | Possible Serial #'s | Other Codes |
| 26 | 0 - 255 | 0 - 65,535 | HID Type - H10301/XceedID 26A |
| 26 | 0 - 255 | 0 - 65,535 | Indala26 |
| 26 | 0 - 255 | 0 - 65,535 | Indala26 |
| 26 | 0 - 255 | 0 - 65,535 | Indala26 |
| 26 | 0 - 255 | 0 - 65,535 | Indala26 |
| 32 | 0 - 16,383 | 0 - 65,535 | HID Type - H103130 |
| 32 | 0 - 65,535 | 0 - 65,535 | Honeywell |
| 33 | 0 - 63 | 0 - 16,777,215 | HID Type - D10202 |
| 34 | 0 - 65,535 | 0 - 65,535 | HID type - H10306 |
| 34 | 0 - 65,535 | 0 - 65,535 | HID Type - N10002 |
| 34 | 0 - 4095 | 0 - 1,048,575 | |
| 35 | 0 - 4095 | 0 - 1,048,575 | |
| 35 | 0 - 4095 | 0 - 1,048,575 | |
| 35 | 0 - 4095 | 0 - 1,048,575 | HID Type - 51880/XceedID 35C |
| 36 | 0 - 255 | 0 - 131,071 | HID Type - A17601 |
| 37 | 0 | 0 - 34,359,738,367 | HID Type - H10302/XceedID 37H |
| 37 | 0 - 65,535 | 0 - 524,287 | HID Type - H10304/XceedID 37X |
| 37 | 0 - 8,191 | 0 - 4,194,303 | |
| 40 | 0 - 4095 | 0 - 65,535 | HID Type - H10314 |
| 42 | 0 - 1,048,575 | 0 - 1,048,575 | HID Type - H10313C |
↧
↧
Calibrate Sensors – GET Group CP500
You must enter Service Mode in order to run the calibration:
To enter Service Mode, hold down the Menu button while rapidly pressing the up and down arrows, starting with up and alternating between them.
When you start holding down Menu, you see:
Mode Select
[User Mode]
When you have done the up-down thing correctly, it changes to:
Mode Select
[Service Mode]
At that point you can stop holding down Menu and stop pressing Up and Down, and you’ll see Adjustment on the screen, as in step 2 of the calibration instructions.
Here are instructions for calibrating the sensors:
Remove both cassettes.
1: First enter service mode
2: Adjustment will show up on printer screen.
3: Scroll down one time until Sensor check shows up
4: Select set and SN01-SN10 will appear
5: Scroll down all the way until Auto Adjustment appears
6: Select the set button and the printer will go through the adjustment.
Turn off printer put cassettes back in and check quality.
↧
Demo Mode – Card Presso
cardPresso runs in demo mode if the cardPresso USB key is not plugged into your computer.
Plug the USB key into a USB port and the software will run as a full version
↧
Clean Printer – Fargo DTC4250e
Take the following steps to run a cleaning cycle on your Fargo DTC4250e:
Go to your printers and faxes folder. Right click on the Fargo DTC4250e and click printing preferences.
Click on the tool box tab

Click on the clean printer tab and follow the instructions

↧
Ribbon Sensor Calibration – Fargo C50
Take the following steps to calibrate the Fargo C50 ribbon sensor:
Go to your printers and faxes folder, right click on the C50 and choose Printing Preferences.
Click on the Tool box tab
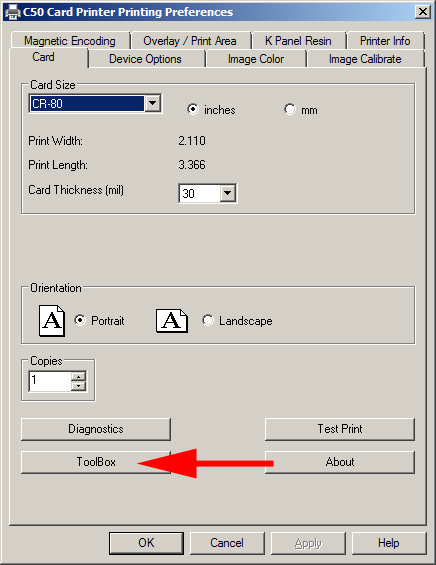
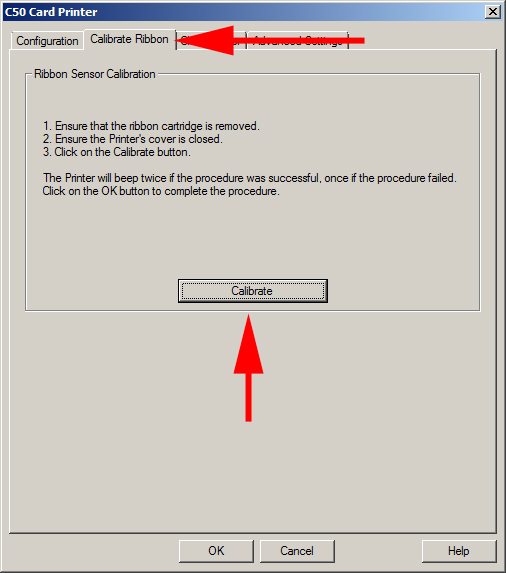
Once the Tool Box opens, click on the Calibrate Ribbon tab, read the instructions, and then click the Calibrate tab
↧
↧
Set Ribbon Type – IDP Smart 30
Take the following steps to change your ribbon type in the Smart-30 printer driver:
Go to your printers and faxes folder. Right click on the IDP Smart-30 Card Printer and click printing preferences.
Click on the Paper/Ribbon/Printing tab and then choose your ribbon type from the drop down box. Click apply and then OK.

↧
Update Firmware – IDP Smart 30/50
Download the latest firmware from IDP’s website
Open the Card Printer Firmware application
Choose your printer from the drop down list
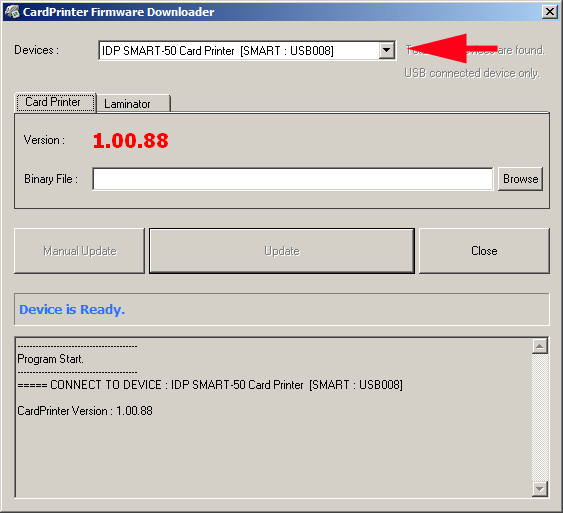
Click the Browse button to the location of the firmware file
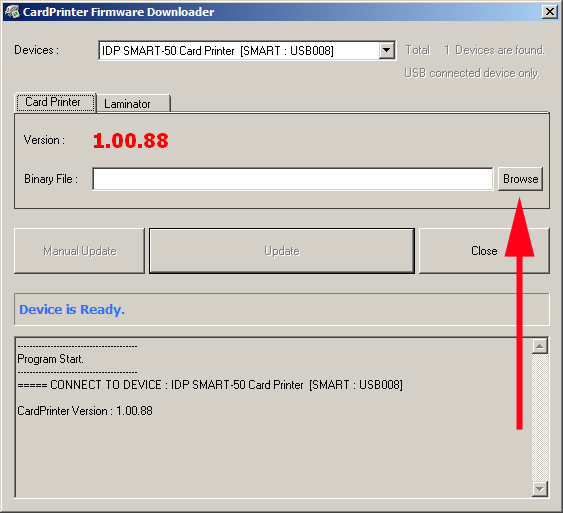
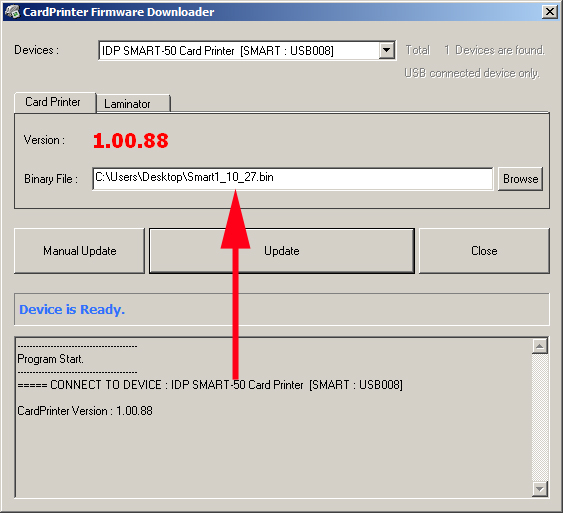
Click Update
 The new firmware version will be displayed once the firmware update is complete
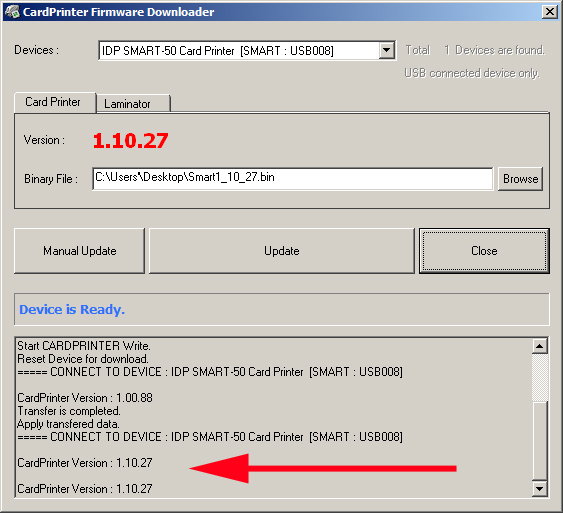
UPDATE: If you have lost or misplaced the disc that came with your printer, you can now download all of the utilities here: Smart-50 Utilities
↧
Ribbon Sensor Calibration – Fargo 4250e
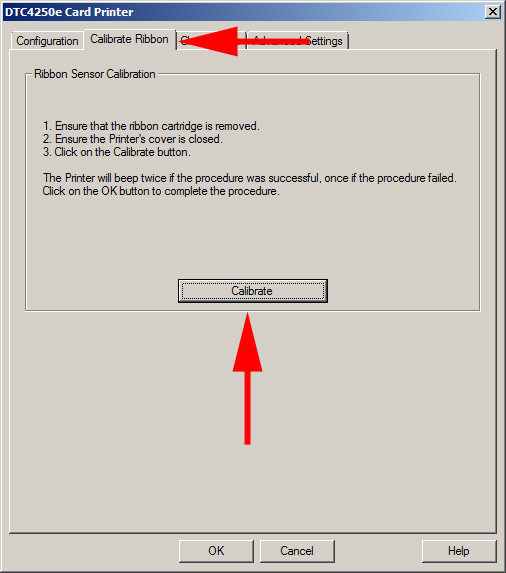
Take the following steps to calibrate the Fargo DTC4250e ribbon sensor:
Go to your printers and faxes folder, right click on theDTC4250e and choose Printing Preferences.
Click on the Tool box tab
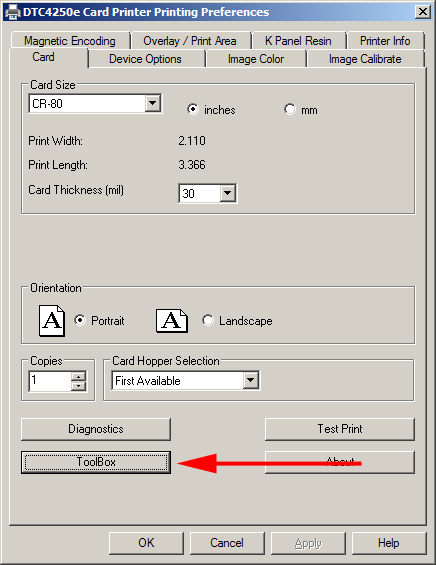
Once the Tool Box opens, click on the Calibrate Ribbon tab, read the instructions, and then click the Calibrate tab
↧